How to Apply Laura Geller Makeup: A Complete Step-by-Step Guide
Laura Geller Beauty built its reputation on baked formulas, buildable coverage, and products designed to look natural on mature and textured skin without settling into fine lines. But even the best-formulated makeup only performs as well as the technique behind it. Baked powders, in particular, behave differently from pressed powders — they need to be “cut” properly, applied with the right tools, and layered in the correct order to deliver that soft-focus, airbrushed finish the brand is known for.
This guide walks through a complete Laura Geller application routine from bare skin to finished face: prep, primer, foundation, concealer, setting, color, eyes, and lips — along with the small technique adjustments that make a real difference with baked and cream-based formulas specifically.
Getting to Know the Laura Geller Product System
Before getting into application, it helps to understand what makes this brand’s formulas distinct, since the technique often depends on the product type.
Baked powders (like the Baked Balance-n-Brighten Color Correcting Foundation and Baked Blush-n-Brighten) are cured on terracotta tiles rather than pressed with talc and binders the way conventional powders are. This gives them a marbled, multi-tonal look in the pan and a finish that’s more luminous and blendable than a standard powder — but it also means they can look chalky or patchy if applied dry with a stiff brush. Most baked products from this line are designed to be used damp, dry, or even wet, depending on the coverage level you want.
Cream-to-powder and liquid formulas (like the Spackle primers and the Double Take Concealer) behave more like typical prestige makeup — they blend with fingers, sponges, or brushes and set on their own.
Color-correcting undertones are baked into several products in this range. The Balance-n-Brighten foundation, for example, has a subtle peach or yellow undertone milled into the powder to counteract sallowness or redness, which means how you blend it (and how much you use) affects whether that correction reads as natural or as a visible cast.
Keeping these formula differences in mind is the key to getting a polished result rather than a flat, powdery one.
Step 1: Start With Clean, Moisturized Skin
Makeup only looks as good as the canvas underneath it, and this is especially true for baked and powder-based products, which will grab onto dry patches and emphasize texture.
- Cleanse with a gentle formula suited to your skin type. Avoid anything stripping right before makeup application, since dehydrated skin causes powder products to cling and look cakey.
- Moisturize and let the product absorb fully — give it a few minutes before moving on. Rushing this step is one of the most common reasons foundation looks patchy later.
- Address any specific skin concerns with targeted skincare (eye cream for under-eye texture, a hydrating serum for dry areas) before primer goes on. Primer should be the last skincare-adjacent step, not a substitute for hydration.
- Apply SPF if it’s daytime, and let it set for a few minutes before primer.
Skipping hydration is the single biggest reason baked powder foundations look uneven, since the marbled pigment sits on top of dry skin rather than melting into it.
Step 2: Prime With Spackle
Laura Geller’s Spackle line of primers is formulated to address specific concerns — there are versions for hydration, pore-blurring, color-correcting, and redness-reducing, among others. Picking the right one for your skin’s needs makes the rest of the routine easier.
How to apply it:
- Take a pea-sized amount and warm it slightly between your fingertips. This helps it spread more evenly and prevents you from over-applying in one spot.
- Apply in thin layers starting from the center of the face — nose, forehead, chin — and blend outward toward the hairline and jaw, where less product is needed.
- Pay extra attention to areas where foundation tends to break down fastest: the T-zone for oily skin, or the cheeks and around the mouth for dry skin.
- Let the primer set for a full minute or two before moving on to foundation. Primer that hasn’t set will cause foundation to slip and pill rather than adhere.
If you’re using a color-correcting Spackle (green for redness, lavender for sallowness, peach for under-eye darkness), apply it only where that specific concern shows up rather than all over the face — over-application will show through your foundation as an unwanted tint.
Step 3: Apply the Baked Balance-n-Brighten Foundation
This is the brand’s signature product, and it’s also the one most people apply incorrectly the first time, because a baked powder foundation isn’t used quite like a pressed compact.
Choosing your method based on desired coverage:
- Sheer, everyday coverage: Use a dry, fluffy powder brush and buff the product on in circular motions.
- Medium coverage with a dewier finish: Dampen a makeup sponge slightly (it should feel just barely moist, not wet) and press the product into skin rather than swiping it.
- Fuller coverage: Use a slightly damp sponge and build up in thin layers, letting each layer set for a few seconds before adding more, rather than applying one thick layer.
Step-by-step application:
- Swirl your brush or sponge over the surface of the pan to pick up the marbled colors together rather than digging into just one section — this is what gives the multi-tonal, color-correcting effect its purpose.
- Tap off any excess product before applying to your face. Baked powders are pigmented, and a heavy first pass is hard to blend out evenly.
- Start at the center of the face and work outward in soft, circular or stippling motions (depending on your tool), blending toward the hairline, jaw, and neck so there’s no visible line of demarcation.
- Build coverage gradually in areas that need more — around the nose, chin, and any redness — rather than applying a uniform heavy layer everywhere.
- If you dampened your sponge, let the foundation set for about 30 seconds before touching it again, since powder-based formulas need a moment to “melt” into the dampness for that skin-like finish.
A common mistake is using too dry a brush with too little product warmth — this tends to leave a slightly frosty or ashy cast, especially in photos. Warming the brush against the back of your hand for a few seconds before application, or lightly misting your face with a setting spray beforehand, both help the powder adhere more smoothly.
Step 4: Conceal Strategically
Laura Geller’s Double Take Concealer is a two-in-one product with a color corrector on one end and a skin-matching concealer on the other, so the application sequence matters.
- Apply the color-correcting side first, but only directly on the discoloration you’re targeting — under-eye darkness, redness around the nose, or dark spots. A little goes a long way; you’re correcting tone, not adding coverage yet.
- Pat, don’t rub, it into place with a fingertip or small sponge. Rubbing disturbs the corrector and can drag it outside the area you meant to treat.
- Layer the matching concealer shade on top, applied in a small triangle shape under the eyes (this brightens the under-eye and cheek area as a unit rather than leaving a hard-edged circle) or dabbed directly onto blemishes and dark spots elsewhere.
- Blend with a damp sponge, bouncing rather than dragging, to melt the edges into the surrounding foundation.
- Set immediately if you have oily under-eyes or are applying in a warm climate, using a light dusting of translucent powder pressed on with a small fluffy brush — this prevents creasing later in the day.
Applying concealer before foundation (rather than after) is a common alternative technique, especially for color correction, but most people find it easier to gauge exactly how much concealer they still need once foundation is already on, since foundation itself provides some coverage.
Step 5: Set With Powder (If Needed)
If you used a wet or damp application method for your baked foundation, you may not need much additional powder, since the formula already sets to a natural matte-to-satin finish on its own. If you have oily skin or want extra longevity, a light setting step helps.
- Use a fluffy brush, not a dense one, to avoid disturbing the foundation underneath.
- Focus only on areas prone to oil or movement — typically the T-zone, chin, and under the eyes — rather than powdering the entire face, which can look flat and mask the natural glow the baked formula is designed to create.
- Press the powder in with light tapping motions in areas where you want maximum staying power (under the eyes, around the nose), and use soft sweeping motions everywhere else.
Step 6: Bronzer, Blush, and Contour — In the Right Order
This is where Laura Geller’s color products come in, and the order you apply them affects how natural the final result looks.
Contour first (if using): Apply a shade slightly darker than your natural skin tone into the hollows of the cheeks, along the jawline, and at the temples. Blend thoroughly with a clean brush before adding anything else, so there’s no visible line.
Bronzer next: Using a fluffy brush, sweep bronzer across the areas the sun would naturally hit — the tops of the cheekbones, the bridge and tip of the nose, the forehead, and the chin — in a loose “3” shape on each side of the face. Tap off excess product before application to avoid patchiness, and blend in windshield-wiper motions to soften edges.
Blush after bronzer: Smile to find the apples of your cheeks, and apply the Blush-n-Brighten (another baked formula) with a rounded brush, blending up and out toward the temples. Because this is also a baked formula, the same damp-vs-dry technique from the foundation step applies — a slightly damp brush gives more pigment payoff for a flushed look, while dry application gives a softer wash of color.
Highlighter last: Apply to the high points of the face — cheekbones, brow bone, bridge of the nose, cupid’s bow, and the inner corners of the eyes — using a small, precise brush or a fingertip for the most natural placement. A little product goes further than expected with baked highlighters, since the shimmer particles are concentrated.
Applying products in this order (contour, bronzer, blush, highlight) rather than blush first prevents the warmth from bronzer muddying your blush color, and keeps the highlighter sitting crisply on top rather than getting blended away into everything underneath it.
Step 7: Eyes
Laura Geller’s eye products, including cream and powder shadows and the Inkstinct Eyeliner, follow the standard order of eye makeup application, with a few brand-specific notes.
- Prime the lids with a small amount of the same primer used on your face, or a dedicated eye primer, to prevent creasing and help shadow color show up true.
- Apply a transition shade in the crease using a fluffy blending brush to create soft depth before adding any pigment.
- Pack on your main shadow shade to the lid using a flat, dense brush for maximum color payoff, especially if using a cream shadow formula, which should be applied with fingertips or a synthetic brush and blended out quickly before it sets.
- Blend the crease and lid seamlessly using a clean fluffy brush in circular motions where the two colors meet.
- Line the eyes with the Inkstinct Eyeliner, starting from the inner corner and building the line thicker toward the outer corner for a natural-looking wing. This formula is designed to be smudge-resistant, so work in small, deliberate strokes rather than one continuous line if you’re new to it, correcting as you go before it fully sets.
- Add mascara in a zigzag motion from root to tip to separate and volumize lashes without clumping.
- Fill in brows last, using short, hair-like strokes that follow your natural growth pattern, then brush through with a spoolie to blend the product and soften any harsh lines.
Step 8: Lips
Finish the face with lip color, applied last so you can judge the full look before committing to a shade.
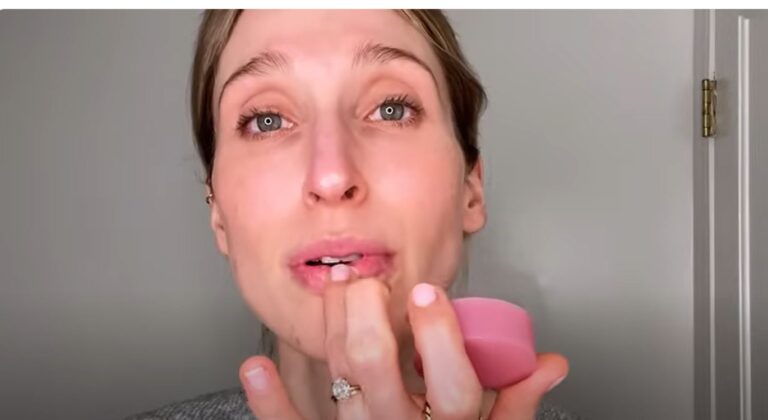
- Exfoliate and moisturize lips beforehand if they’re dry, since lip color (particularly matte formulas) will emphasize any flaking.
- Line lips first if using a liner, staying just at or slightly outside your natural lip line for subtle fullness, then fill in the entire lip with the liner as a base — this helps color last longer and prevents visible line demarcation as the lipstick wears through the day.
- Apply lipstick from the center of the lips outward, using a lip brush for precision or applying directly from the bullet for a quicker, more casual finish.
- Blot with a tissue and reapply a second thin layer for longer wear, especially with cream or matte finishes.
Setting the Look
Once everything is applied, a setting spray helps meld all the layers together and extends wear time. Mist it in an X and then a T pattern across the face from about arm’s length away, and let it air dry rather than patting it in, which can disturb the makeup underneath. This step is particularly worthwhile after using baked powder products, since it helps “melt” the powder finish into a more skin-like texture rather than leaving it looking dusty.
Application Tools That Make the Biggest Difference
The right tools matter as much as the products themselves, particularly for baked formulas:
- A damp makeup sponge is arguably the single most useful tool in this entire routine — it’s what unlocks the full range of coverage from sheer to full with the baked foundation and blush, and it gives a more natural, skin-like finish than a brush alone.
- A fluffy powder brush for bronzer, blush, and setting powder application, since a dense brush tends to deposit too much pigment at once with baked formulas.
- A small, tapered brush for concealer and highlighter placement, where precision matters more than coverage area.
- A clean spoolie for blending brows and softening any harsh lines in cream products.
Tips for Different Skin Types and Concerns
Mature or dry skin: Focus on hydration before anything else, and lean toward damp application methods for baked powders rather than dry brush application, which can settle into fine lines and emphasize texture. Cream-based blush and highlighter formulas (if available in your product lineup) may blend more seamlessly than powder for very dry skin.
Oily or combination skin: Dry brush application of the baked foundation, followed by a light setting powder in the T-zone, will hold up better through the day than a fully dewy application. Blotting papers throughout the day work well with this formula system without disturbing the base underneath.
Textured or acne-prone skin: Avoid overworking the sponge or brush in any one area, since excessive blending can drag makeup into texture and emphasize it rather than smoothing it out. A light, even hand with buildable layers works better than one heavy application.
Common Mistakes to Avoid
- Applying baked powder completely dry with a stiff brush, which tends to look chalky and doesn’t take advantage of the formula’s blendability.
- Skipping primer, especially with color-correcting Spackle formulas, which are doing real work to even out tone before foundation goes on.
- Applying blush before bronzer, which can leave color muddled rather than layered cleanly.
- Over-blending highlighter, which dulls the shimmer and defeats the purpose of a precise, luminous placement.
- Not letting each layer set before adding the next, which causes product to pill, especially with primer-to-foundation and concealer-to-powder transitions.
- Using too much product initially. Nearly every product in this line is designed to be buildable, and it’s far easier to add more than to remove excess once it’s blended in.
Final Thoughts
The core idea behind a Laura Geller application routine is patience with layering and attentiveness to how baked and cream formulas respond to moisture, warmth, and tool choice. None of the individual steps are complicated, but small technique choices — a damp sponge instead of a dry brush, applying bronzer before blush, letting primer set before foundation — are what separate a flat, powdery result from the soft, luminous finish the brand is actually formulated to achieve. Once you’ve done the routine a few times and get a feel for how your specific skin responds to damp versus dry application, the whole process takes only a few extra minutes over a standard makeup routine, with a noticeably more polished payoff.

- 10 Best Aquarium Filter Media 2026 - September 24, 2026
- How to Apply Laura Geller Eye Makeup: A Complete Guide - September 24, 2026
- How to Apply Laura Geller Makeup: A Complete Step-by-Step Guide - September 24, 2026