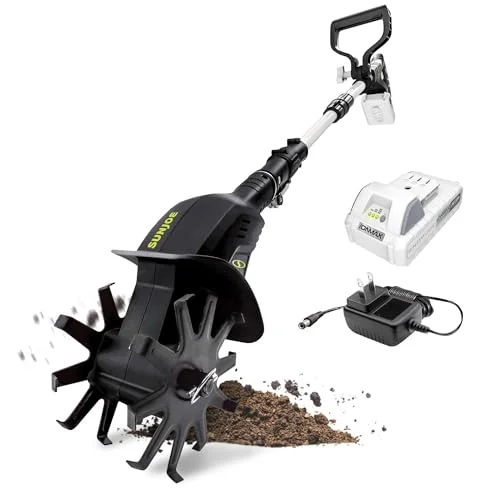
Battery Tiller for Raised Garden Beds: Choose Size, Power & Tips
Battery tillers cut prep time for raised beds by up to half compared with hand tools, reducing back strain and noise while protecting bed walls and roots when used correctly. Busy gardeners can choose compact, low-vibration models for tight spaces, lightweight portability, and easy maintenance between seasons, plus quick charging.
Quick answer: choose based on bed width, soil type, and battery runtime, prefer compact two-wheel or cultivator designs for narrow beds, expect lighter power than gas but far less noise, and consider hand tools for very shallow or root-dense beds.
Choosing Tiller Size
Measure bed width and access paths before choosing a tiller; aim for a blade width at least 2–4 inches narrower than the narrowest path so the unit fits without scraping sidewalls. Check bed depth—tines 4–6 inches handle topsoil mixing while 8–10 inch tines reach deeper; consider a battery tiller for raised garden beds once these clearances match your layout.
Match blade width, tine length and footprint to avoid damage and tight turns; follow these sequential checks:
- Record the narrowest pathway and interior bed width, then subtract 2–4 inches to determine maximum blade width for safe entry and maneuvering.
- Choose a tine length based on soil depth and compaction: 4–6 inches for light mixing and planting beds, 8–10 inches for deep amendments or compacted clay.
- Verify overall footprint including handles and wheels so the machine can turn in place and clear gates or braces without hitting bed walls.
- Reserve extra clearance for battery removal and tilting angles; mock-measure with a tape or cardboard cutout before buying to confirm fit in tight garden lanes.
Matching Power to Soil
Torque and tine speed determine how effectively you break loose soil versus compacted clay; select a model with higher torque and lower tine RPM for dense beds, and faster RPM with moderate torque for already friable soil. For a battery tiller for raised garden beds aim for 20–40 Nm torque for clay-heavy beds and 8–15 Nm for loose, amended soil.
- Assess soil hardness by digging a 6-inch plug and squeezing it; if it forms a dense ball you have clay or heavily compacted soil requiring high torque and slow, forceful tines.
- Match tiller specs: prioritize torque (Nm) over just battery volts for breaking roots and clay; look for models with metal gearbox and variable speed control for better control in mixed soils.
- Set tine speed: use low speed (around 60–120 RPM effective tine speed) when fighting compacted layers, increase to higher speed for surface mixing and fluffing in loose beds to save battery and avoid uprooting plants.
- Re-check after one pass: if clods remain, make a second slow pass or cut depth shallower and increase torque; avoid repeated high-speed passes that overwork the battery and compact lower layers.
Battery Runtime & Charging
48V 2.0Ah packs typically deliver about 20–30 minutes of steady work in loose soil and 10–15 minutes in heavy clay; expect 15–25 minutes average in typical raised beds, depending on blade load and depth. For a single 4’x8′ bed to 6″ depth plan for two passes and one battery swap when soil is compacted, and one battery for light fluffing.
Stagger battery strategy: pair one charged pack on the tool and one warming on a charger to cut downtime, or buy a second identical battery if you want uninterrupted work on multiple beds. Match Ah ratings and voltage across spares so the tool draws evenly; mixing voltages voids warranties and reduces runtime predictability.
Store batteries partly charged in cool, dry places and follow manufacturers’ charge cycles: charge after use but avoid leaving packs at 100% on a charger for weeks. Calibrate smart batteries quarterly by fully charging then discharging once; avoid deep-storage below 20% state-of-charge and never freeze packs to preserve cell life.
Maneuvering Tight Spaces
Lightweight, narrow models trim beds more precisely than bulkier units; pick a tiller no wider than your bed minus 2–3 inches to avoid scraping sideboards. Match tine length to topsoil depth and choose machines under 25–30 lbs for easy repositioning. Measure your tightest access point before buying so you don’t end up grounding out or forcing turns.
Ergonomic handle placement speeds one-handed corrections and prevents plant damage; look for adjustable-height grips and variable-speed triggers so you can feather power near stems. Reversible tines (forward/reverse) let you back out without dragging roots or flipping the unit; test that function in packed soil. Using the phrase battery tiller for raised garden beds in specs helps find models designed for confined beds.
Short-radius turning is safest: lift handles slightly, use your rear hand to steer, and pivot the rear of the tool rather than spinning the whole unit. Lock wheels or use a jog-step technique when you must change direction between beds to avoid tearing bed edges. Store and transport with tines covered and battery removed to keep maneuvering predictable next use.
Protecting Beds & Roots
Edge-guards prevent blade contact with bed walls and roots by limiting tiller depth and lateral reach; install a physical guard or clamp-on shield before use to avoid splintered wood or crushed edging. Use the lowest depth setting for initial passes and keep blades away from perennial roots; a single mention: battery tiller for raised garden beds users should test on a corner first.
- Lower depth to 1–2 inches for first pass to loosen surface soil without reaching roots or undermining bed walls; this reduces torque and sudden pulls that push against edges.
- Keep a 6–8 inch buffer from all bed sides and plant stems while tilling; mark the buffer with string or stakes to maintain consistent distance during passes.
- Overlap passes by half the tiller width and move slowly to avoid gouging edges; use short, controlled strokes rather than long aggressive runs to protect both wood and soil structure.
- Hand‑rake finish along edges and near plants to tidy soil without blades; use a hori‑hori or hand fork for shallow aeration close to roots instead of the tiller.
Operation Safety & Maintenance
Protective gear: Wear gloves, eye protection, and closed-toe shoes before handling the tool; a dust mask helps in dry soil. Check battery charge and blade guard before use, and keep the full model name—battery tiller for raised garden beds—nearby for reference. Follow this tight startup and maintenance routine to protect yourself, the bed, and the tiller.
- Inspect tines and guard visually for cracks, bends, or debris; tighten loose fasteners and replace damaged tines before operating.
- Start procedure: remove battery, clear bed of rocks and roots, then install charged battery and ensure safety switch is off until ready.
- Operate slowly on first pass: use shallow depth, walk forward steadily, avoid twisting the handle, and stop if vibration increases or unusual noise occurs.
- Clean immediately after use: brush soil off tines, spray moving parts with light water then wipe dry, and remove plant residue from air vents.
- Store dry and cool: remove battery, charge to about 50–70% for winter storage, keep unit indoors on a shelf away from moisture and rodents.
- Service annually: sharpen or replace tines if blunt, lubricate pivot points with light oil, and test battery capacity; schedule pro repair for motor or gearbox issues.
Alternatives and Budget Picks
Battery-powered models suit most raised-bed users who need low-noise, low-maintenance soil prep; pick an 8–12 inch working width for single-row beds, a lightweight frame under 30 lbs for tight maneuvering, and at least a 2.0–2.5 Ah 40V battery or equivalent for consistent torque through loamy soil. Prioritize serviceable tines and easy-tilt handling.
Corded cultivators work well when you have reliable outdoor power and very light soil; a garden corded tiller or electric cultivator gives steady RPMs and cheaper initial cost but limits reach. For compact battery options consider EGO (mid-range, strong torque) or Greenworks 40V (budget-friendly, light). For no-power choices, use a broadfork or stirrup hoe for deep aeration; pick a small powered option if you need repeat seasonal prepping. Use “battery tiller for raised garden beds” only if you frequently prep multiple beds and value speed over initial cost.
Decide by bed size: choose manual tools for under 4 sq ft or root-sensitive plantings, corded for light, nearby beds, and compact battery units for repeated seasonal work across several raised beds.
Quick Summary
- Battery tillers are cordless, low-noise tools ideal for lightly cultivating soil in raised garden beds without fumes or a gas engine.
- Choose a model with enough torque and tine width for the size of your beds—narrower tines (12–18 inches) suit tight or closely spaced beds better.
- Battery capacity (Ah) and voltage determine runtime and power; expect 20–60 minutes of continuous use per charge depending on soil hardness and battery size.
- Lightweight and compact designs improve maneuverability in confined raised beds, but heavier units deliver deeper penetration and handle compacted soil better.
- Look for adjustable tine depth, reversible rotation, and safety features (dead-man switch, blade guards) for more control and safer operation around roots and bedding frames.
- Consider battery compatibility with other garden tools, spare batteries for extended sessions, simple maintenance (cleaning tines, charging), and overall upfront cost versus long-term convenience.
Frequently Asked Questions
Is a battery tiller suitable for narrow or shallow raised beds?
Yes—many battery tillers come in compact widths and with adjustable tines designed for narrow or shallow beds, but you should check the current tiller’s working width and depth settings before buying. For very narrow or border-style beds, consider a handheld cultivator or a compact mini-tiller to avoid damaging bed edges and to maintain maneuverability.
Will a battery-powered tiller handle heavy clay or compacted soil?
Battery tillers are best for light to medium soils and regular maintenance; they can break up moderately compacted soil but struggle with very heavy clay or deep compaction. For tough soils you may need to pre-amend with compost, use a larger electric/diesel-powered machine, or make multiple shallower passes to avoid overworking the battery and motor.
How long does the battery last and is that enough to finish a typical raised bed?
Run time varies by model and battery capacity but many consumer battery tillers provide 20–60 minutes per charge, often enough for several standard 4×8 ft raised beds if you’re doing light cultivation. Look for models with spare battery options or quick-swap batteries if you have larger areas, and consider battery amp-hours (Ah) and voltage together to compare real-world runtime.
Will a battery tiller damage plant roots or my raised bed structure?
If used carefully, a battery tiller shouldn’t harm established roots or bed frames; use shallow depths near existing plants and keep tilling away from root zones. To protect bed sides and frames, choose a tiller with adjustable tine depth and a narrow profile, and always inspect and move slowly in tight spaces.
Are battery tillers low-maintenance and do they really save time over hand tools?
Yes—battery tillers require less maintenance than gas models (no fuel mixing, fewer parts) and are quieter and cleaner, with simple tasks like charging and occasional tine cleaning/lubrication. For small-to-medium raised beds they typically save significant time and physical effort compared with hand digging or hoes, though for spot work or delicate beds hand tools may still be preferable.

- Cordless Tillers vs Hard Soil: Power, Limits, and Techniques - April 5, 2026
- Cordless Tillers vs Hard Soil: 7 Tips to Break Compaction - April 5, 2026
- Battery Tiller Digging Depths: Typical Depths & Limits - April 5, 2026