Handling Grease & Stains
Let’s be real. Not all cabinet messes are created equal. While a simple dusting and wipe-down will take care of everyday grime, a busy kitchen produces a far more formidable foe: stubborn grease and tough stains. These require a strategic, targeted approach. Don’t panic; with the right knowledge, you can tackle these problems without damaging your cabinet’s beautiful finish. This section is all about becoming a true stain-fighting expert.
Cleaning Stove-Adjacent Cabinets Prone to Grease
The cabinets around your stove are the front line of the kitchen. Every time you cook with oil, fats become airborne and a thin, sticky film settles on the surfaces nearby. This greasy residue then acts like flypaper, attracting dust, dirt, and pet hair. It’s the reason those cabinets always feel a little tacky to the touch.
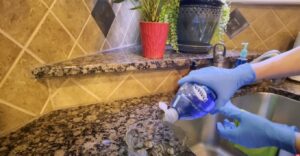
My go-to solution for this is to use a slightly more concentrated version of your DIY cleaner or to simply make a second pass. For a heavy buildup, a simple solution of white vinegar and warm water is an excellent degreaser. Apply it with a microfiber cloth, let it sit for a minute or two to let the acidity break down the grease, and then wipe it away. For really old, hardened grease, you might have to clean the area once and then immediately repeat the process. Don’t be afraid to put a little more elbow grease into it, but be careful not to scrub too hard. The goal is to let the cleaner do the work, not to scrape the grime off with brute force.
Removing Tough Stains Without Damaging the Finish
Stubborn stains, whether they’re from a food splatter, a marker mark, or a mysterious brown spot, are frustrating. When your go-to cleaning solution just isn’t cutting it, you need to bring in a specialized tool. The key is to find something that can remove the stain without removing the cabinet’s protective finish. For most stains, a gentle, multi-purpose, wood-safe cleaner and a soft cloth will do the trick. A small amount of baking soda mixed with water to form a paste can also be applied to a spot, left for a moment, and then wiped away gently. The mild abrasion of the baking soda can help lift the stain without scratching.
Using Melamine Sponge Carefully for Stubborn Marks
When you’re faced with a tough scuff mark or a stain that seems impossible to remove, a melamine sponge (often called a Magic Eraser) can be your best friend. But I cannot stress this enough: use it with extreme caution. A melamine sponge is not a regular sponge; it is, at its core, a micro-abrasive. Think of it as an extremely fine-grit sandpaper.
To use it safely, wet the sponge and wring it out completely. Apply it to the stubborn mark with the lightest possible pressure. Use a gentle, circular motion. You’ll literally be sanding away a microscopic layer of the cabinet’s finish to remove the stain. For this reason, it should only be used as a last resort and only on the specific spot that is stained. Never use it to clean a large area, as it will leave a dull, noticeable spot where the finish has been worn away.
Cleaning High-Touch Areas: Knobs, Pulls, and Edges
Let’s be real, you touch your cabinet handles a thousand times a day. All those oils from your hands, coupled with any grease from cooking, make them a hotspot for grime. While you’re doing your deep clean, make sure you give these areas some special attention. A small, soft brush is perfect for getting into the nooks and crannies around the base of the hardware. For a truly thorough clean, a cotton swab dipped in your cleaning solution can get into the tightest spots. You can even remove the hardware entirely to give both the handle and the cabinet a proper clean. It’s the small details like this that make all the difference in the final result.
Drying & Polishing Cabinets
You’ve done the hard work of cleaning away all the grime. Now for the final two steps that will not only leave your cabinets sparkling but also add a crucial layer of protection. This is where a good clean becomes a truly professional, long-lasting one.
Importance of Thoroughly Drying to Prevent Warping or Water Damage
I cannot overstate this: thorough drying is the most crucial step in cleaning wood cabinets. Wood is a porous material. If you leave moisture sitting on the surface, it will be absorbed, causing the wood to swell, warp, and potentially bubble up the finish. Even if it doesn’t cause major damage, a simple water spot can dry and leave a permanent mark.
As you clean, you must immediately follow up with a clean, dry cloth to completely wipe away any and all moisture. Don’t let water sit on the surface for even a minute. If your drying cloth becomes damp, swap it out for a fresh, dry one immediately. This step is non-negotiable and is the best way to prevent your beautiful cabinets from being ruined by a bad cleaning job.
Applying Natural Wood Wax or Polish
Once your cabinets are sparkling clean and completely dry, it’s the perfect time to give them a little extra love with a protective polish. This isn’t just about shine; it’s about creating a protective barrier that will make your future cleaning jobs easier. A good polish can fill in tiny scratches, restore the wood’s natural luster, and repel water and dirt.
To apply a polish, spray it onto a soft cloth first, rather than directly onto the cabinet. This gives you more control and prevents drips. Then, wipe the polish onto the cabinet in the direction of the wood grain. This step feels incredibly rewarding after all the cleaning you’ve done.
Buffing Cabinets to Restore Shine
Once the polish has been applied, it’s time for the final touch: buffing. Using a separate, clean, and dry microfiber cloth, gently buff the surface of the wood in a circular motion. This works the polish into the finish, removes any excess product, and brings out a beautiful, rich glow. You’ll be amazed at how this simple step can completely revitalize the appearance of your cabinets, making them look brand new again.
Alternative Natural Polishes: Olive Oil, Beeswax
If you prefer to avoid commercial polishes, you can create your own natural alternative that’s both safe and effective. My personal favorite is a mixture of olive oil and white vinegar. In a small bowl, mix about one cup of olive oil with a quarter cup of white vinegar. Apply it to a cloth and use it to wipe down the cabinets, buffing as you go. The oil will condition the wood and the vinegar will help cut through any lingering grime. A beeswax-based wood conditioner is also an excellent option. It provides a more durable, long-lasting protective layer and smells fantastic.
Now that the outside of your cabinets is gleaming, it’s time to tackle the inside. While the interior might not get greasy, it does collect crumbs, dust, and spills. Cleaning the inside of your cabinets is not only hygienic, but it’s also the perfect opportunity to get your kitchen organized once and for all.
Cleaning Inside Cabinets and Drawers
I’ve been there—you look at all your cabinets, and the thought of emptying them all at once is just overwhelming. My go-to advice: clean one cabinet at a time. Seriously. Don’t try to empty your entire kitchen all at once. It just creates a huge mess and can leave you feeling defeated before you even start.
The best approach is to tackle one cabinet or drawer at a time. Create a “staging area” on your countertop, empty the contents of that cabinet, and then proceed with cleaning. First, use a vacuum with a soft brush attachment to get rid of all the crumbs and dust. Then, use your gentle cleaning solution and the “three-towel system” to wipe down the shelves and interior walls.
Decluttering While Cleaning
This is the perfect opportunity to declutter. As you’re taking everything out of a cabinet, take a moment to look at each item before you put it back. Do you still use that oddly shaped bowl? Is that a spice jar from three years ago? I promise you’ll be surprised at what you find. I usually end up with a small box of items to donate or throw away after every big cabinet clean. This decluttering step not only makes your kitchen more functional but also makes it easier to keep clean in the future.
Prioritizing Frequently Used Cabinets (Spice Drawers, Dish Storage)
If a full-scale interior clean feels like too much, it’s okay to start small. Prioritize the areas that get the most use, as these are the ones that are likely the dirtiest. Your spice drawer or cabinet, the dish cabinets, and the utensil drawers are all high-traffic areas that are well worth the effort to clean first. These are the spots where spills and crumbs are most likely to accumulate. By tackling these first, you’ll get the most bang for your buck in terms of cleanliness.
Maintenance & Frequency
A big deep clean is satisfying, but it’s the small, consistent maintenance that keeps your cabinets looking great day in and day out. Think of it like a workout routine—a big session is good, but consistent daily effort is what produces the best results.
Recommended Cleaning Schedules: Weekly, Monthly, and Seasonal Deep Cleaning
- Weekly: Give the cabinet doors and drawers near your stove, sink, and garbage can a quick wipe-down with a damp cloth. These are your high-traffic zones and the areas most susceptible to grease and food splatters. A quick, weekly wipe prevents grime from building up and becoming a major chore later.
- Monthly: Do a more thorough wipe-down of all your cabinet fronts and hardware. You don’t need to do the full “three-towel system” every time, but a good wipe with a damp, soapy cloth followed by a dry one will keep things looking fresh.
- Seasonal Deep Cleaning: Plan a full-scale deep clean, including the interiors and a protective polish, about once or twice a year. This is the perfect time for a big decluttering session and a complete refresh of your kitchen.]
Preventing Grease Build-Up and Discoloration
The best way to deal with grime is to prevent it from happening in the first place. You can do a few simple things to keep your cabinets cleaner for longer:
- Use your exhaust fan! When you’re cooking with oils or high heat, turn on your stove’s exhaust fan. This will help pull the airborne grease and steam away from your cabinets.
- Wipe spills immediately. If you get a splatter of food or a splash of water on your cabinets, wipe it up right away. Don’t let it sit and harden into a stain.
- Use the “damp, not wet” rule. When cleaning spills, make sure you’re using a damp cloth and not a soaking-wet one.
Protecting Wood Finish from Water, Oil, and Heat
Finally, remember the core principles of wood cabinet care: be gentle and be mindful of moisture.
- Always dry. Never let water sit on the surface of your cabinets.
- Choose the right cleaner. Avoid harsh chemicals like bleach or ammonia that can strip the finish.
- Consider a protective polish. A regular application of a natural wax or polish can add a layer of protection that repels moisture and grime, making your job much easier in the long run.
Safety & Precautions
When it comes to cleaning wood cabinets, the most important part of the job has nothing to do with the cleaning itself. It’s about a commitment to safety and a deep understanding of what not to do. Using the wrong products or tools can cause irreversible damage, so it’s essential to approach this task with a cautious mindset. Think of these precautions as your insurance policy for preserving the beauty and longevity of your cabinets.
Avoiding Harsh Chemicals (Bleach, Ammonia, Solvents)
This is the golden rule of wood cleaning, and I simply can’t stress it enough. Never, under any circumstances, should you use harsh chemicals on your wood cabinets. Products containing ammonia, bleach, acetone, or other strong solvents are designed to strip and cut through grime on non-porous surfaces like countertops and tile. When used on wood, they can and will strip away the protective finish, leaving the porous wood exposed and vulnerable. Once that finish is gone, the wood is susceptible to staining, warping, and discoloration. Over time, these chemicals can even cause the wood to become brittle and dull. Stick to the gentle, pH-neutral solutions we’ve discussed. It’s simply not worth the risk.
Avoiding Abrasive Tools (Steel Wool, Scouring Pads, Hard Brushes)
Just as the wrong chemical can damage your cabinets, so can the wrong tool. While a tough scouring pad might seem like the best way to tackle stubborn grime, using any abrasive material on your cabinets is a recipe for disaster. Tools like steel wool, scouring pads, and hard plastic brushes will leave tiny, visible scratches on your finish. Over time, these fine scratches can accumulate, making your cabinets look dull and worn.
The exception to this is the melamine sponge, but as I’ve mentioned before, it must be used with extreme caution. Remember, it’s essentially a very, very fine sandpaper. It should only be used as a last resort and only on the specific spot that is stained. Never use it to clean a large area, as it will leave a dull, noticeable spot where the finish has been worn away.
Always Patch-Testing Cleaners Before Use
This is a simple step that takes less than a minute but can save you from a major disaster. Every wood finish is different, and you can’t assume that a cleaner that worked perfectly on one type of wood will work on another. So, before you apply any cleaning solution to your cabinets, you must perform a patch test.
To do this, simply apply a small amount of your cleaning solution to a hidden or inconspicuous area. A great place is on the inside of a cabinet door near the hinge, or in a corner near the floor that nobody ever sees. Let the solution sit for a few minutes, then wipe it off with a clean cloth. Wait for a few hours, or even a full day, to check for any signs of damage, discoloration, or a sticky film. If the area looks unchanged, you can proceed with confidence. This small act of caution is your best insurance against an unwanted result.
Tips to Prevent Scratches, Streaks, or Finish Damage
Even when you’re using the right products and tools, your technique matters.
- Avoid direct spraying. Never spray your cleaning solution directly onto the cabinets. Instead, spray it onto your microfiber cloth first. This prevents the solution from getting into the seams of the wood and helps you control the amount of moisture.
- Wipe with the grain. Always wipe in the direction of the wood grain. This is a best practice for all wood cleaning and polishing. It helps the cleaner get into the natural grooves of the wood and prevents you from pushing dirt against the grain.
- Be mindful of hardware. While you’re cleaning, be careful not to rub too hard on the cabinet hardware. Over time, repeated abrasion can scratch or wear away the finish on knobs and pulls.
FAQ & Expert Tips
Even after going through all the steps, you might still have a few lingering questions. Here are the answers to some of the most frequently asked questions I receive about cleaning wood cabinets, along with some final expert tips to help you keep your kitchen looking its best.
Is Murphy’s Oil Soap safe for all wood cabinets?
In short, yes, Murphy’s Oil Soap is generally considered safe for most finished wood cabinets. It has a long-standing reputation for being a gentle, plant-based cleaner that is specifically formulated for wood. It is excellent at cutting through grime without stripping the finish. However, there are a few important caveats you should be aware of.
First, it is not designed for unfinished or unsealed wood. If your cabinets have no protective topcoat, you should not use a liquid cleaner on them. Second, it’s very easy to use too much. A little goes a long way. If you use too much, it can leave a subtle residue that feels sticky or attracts dust. For this reason, always use the correct dilution, and I strongly recommend using a second, damp cloth to rinse away any remaining film. If you’re using it on your cabinets for the first time, a patch test is still a must.
Can vinegar harm antique or natural wood finishes?
This is a great question, and it’s one where you need to be very cautious. While a diluted vinegar solution is excellent for modern wood finishes (like polyurethane or lacquer), it’s generally not recommended for antique cabinets. The finishes on antique furniture are often much more delicate and can be vulnerable to the acidity of vinegar. Using vinegar on an old wax or shellac finish could cause it to become brittle or even to break down.
For antique or very old cabinets, I always recommend a much gentler approach. Start with a plain, slightly damp cloth to see if you can remove the grime. If that doesn’t work, consider a specialized, non-acidic cleaner designed for antique wood. When it comes to antiques, the goal is preservation, and the best way to do that is with a gentle, non-reactive cleaner.
How often should cabinet hardware be cleaned?
Cabinet hardware is a major high-touch area in your kitchen, so it gets dirty quickly. For this reason, I recommend a quick wipe-down of all your knobs and pulls weekly. A weekly wipe will prevent the buildup of hand oils and grime, which can be difficult to remove later on.
For a deeper clean, consider wiping down your hardware monthly with a slightly more thorough method. If you’ve been putting off a deep clean for a while, it might be a good idea to remove the hardware entirely so you can get into all the nooks and crannies. This is also a great opportunity to polish the hardware itself.
Quick maintenance tips to keep cabinets shiny between deep cleans
A deep clean is a lot of work, so you want that beautiful, clean look to last as long as possible. Here are a few quick tips to help you maintain your cabinets’ shine between major cleaning sessions.
- Address Spills Immediately: The number one tip for preventing stains and grime is to wipe up spills as soon as they happen.
- Use an Exhaust Fan: Whenever you’re cooking with oils or high heat, turn on your stove’s exhaust fan. This will pull airborne grease away from your cabinets.
- Quick Wipe-Downs: Keep a clean microfiber cloth in your kitchen and give your cabinets a quick wipe-down every few days. This will take care of any dust or light smudges before they can build up.
- Protect with Polish: A good quality, natural wood polish or wax applied every few months can add a layer of protection that repels moisture and grime, making your job much easier in the long run.