How to Freeze a Glass Jar Without Breaking It (Complete Guide)
Glass jars especially ubiquitous Mason J Jars are an ideal solution for eco-friendly Food Storage.
They are reusable, non-toxic, and keep your food safe and visible. However, anyone who has tried to freeze a beautiful jar of homemade broth only to find a shattered mess the next morning knows that glass and sub-zero temperatures don’t always mix.
Learning the simple rules of Freezing Safety for glass is essential to prevent messy accidents and wasteful breakage.
This complete guide will walk you through the science of why glass breaks, how to choose the right kind of jar, and the exact steps for preparing food to guarantee freezer success.
Why Glass Jars Break in the Freezer
The moment a jar shatters in the freezer, it’s natural to blame bad luck, but the cause is entirely scientific and predictable. It boils down to one fundamental principle: the physics of water and the structure of the jar itself.
The Science of Water Expansion
When you place a liquid-filled glass jar into the freezer, the countdown to potential breakage begins.
Water expands by 9% when frozen
Water is unique because, unlike most substances which contract (shrink) as they cool, water actually expands by about 9% when frozen. This expansion happens because the water molecules slow down and form rigid, crystalline structures.
- The Problem: As the liquid contents transition into Ice Crystals, they push outward with tremendous force. Since the glass jar is rigid and cannot expand, this outward Pressure has nowhere to go.
- The Result: If the pressure exceeds the structural integrity of the glass, the jar will crack or explode, typically along its weakest points. You are essentially creating a pressurized vessel designed to fail. The key to safe freezing is giving that 9% expansion space to breathe.
Weak Points in Glass Jars
While the pressure from expanding ice is the force that cracks the glass, the break almost always originates in the weakest part of the jar.
Shoulders and Neck Stress
Standard canning jars, often called Shoulder Jars, are designed for vacuum sealing and stability, but their shape introduces critical stress points when frozen:
- The Shoulder: This is the sloping area where the body of the jar narrows to meet the neck. It acts as a hard boundary that traps the expanding ice. This tight, non-flexible geometry makes the Shoulders and Neck Stress points the most vulnerable areas for cracks. When the ice pushes up, the shoulder stops the expansion, concentrating all the force on that narrow glass ring.
- Glass Thickness: Even the quality of the glass matters. Thinly molded glass, often found in recycled jars, is less resilient to temperature changes and internal pressure, making it much more susceptible to breaking than the thicker glass used by established brands.
Choosing the Right Glass Jar for Freezing
Successfully freezing in glass starts long before you pour in the soup. It starts with choosing a container specifically designed to handle the pressures of expansion. You must swap aesthetics for practicality.
Straight-Sided Jars vs. Shoulder Jars
This is the single most important decision you can make regarding Freezer Safety.
Expansion Space
The fundamental rule of freezer-safe glass is to avoid any design feature that traps expanding ice:
- Straight-Sided Jars: These jars have walls that go straight up from the bottom to the neck, giving the liquid a clear path to rise as it freezes. This crucial Expansion Space allows the expanding ice to move upward without pushing laterally against a restrictive shoulder. Wide-Mouth Jars are always the safest option because they naturally have this straight-sided profile.
- Shoulder Jars: Standard Mason Jars (Regular-Mouth) are excellent for pantry storage and water bath canning but pose a high risk for freezing. The defined “shoulder” is a wall that traps the expanding ice, virtually guaranteeing a break. If you must use them, only fill them with solids or small amounts of liquid that stay well below the shoulder.
Freezer-Safe Glass Options
Certain brands and specific jar styles have been tested and proven reliable in cold environments.
Durability
When selecting jars, choose brands known for thick, durable, tempered glass built to withstand thermal stress:
- Ball Jars and Kilner Jars: Reputable brands like Ball Jars and Kilner Jars offer lines explicitly designated as “Wide-Mouth” or “Freezer Safe.” These are engineered with thicker glass and straight-sided walls to maximize Durability and reduce the risk of thermal shock.
- Tempered Glass: Look for materials that resist sudden temperature changes. While most canning jars are thick enough for typical use, premium brands often ensure a higher quality of glass molding, which resists the microscopic weaknesses that lead to cracks.
Avoiding Recycled Sauce Jars
While reusing jars from products you’ve bought (like pasta sauce or jam) is great for the planet and pantry organization, it’s a high-risk gamble for the freezer.
Thin Glass Risk
- Manufacturing Differences: Jars designed for commercial products like Pasta Sauce Jars or Pickle Jars are made for single-use purposes and typically have Thin Glass Risk. They are manufactured to be inexpensive and light, focusing on short-term stability, not the extreme pressure and temperature changes of the home freezer.
- Inconsistent Quality: The quality and thickness of the glass around the seams, shoulders, and base are often inconsistent in recycled jars, creating hidden weak points that will certainly be exposed by expanding ice. Stick to commercial canning jars for freezing.
Preparing Food Before Freezing
Even the perfect freezer-safe jar will break if the food inside is not prepared correctly. Proper thermal management and careful portioning are the final steps to guaranteeing success.
Cooling Food Properly
Placing hot food directly into a cold glass jar is one of the fastest ways to shatter it, regardless of the jar’s shape.
Prevent Thermal Shock
- The Danger: Glass is sensitive to sudden changes in temperature. Pouring a steaming hot broth into a glass jar and then immediately sealing it and placing it in the freezer is a recipe for disaster, known as Thermal Shock. The exterior of the glass cools rapidly in the freezer, while the interior is still hot, causing uneven stress that results in breakage.
- The Solution: Always Cool Food Properly before transferring it to the jar. Cool the food to room temperature first (about 70°F or less) and then preferably chill it completely in the Refrigerator Cooling phase for several hours before moving it to the deep freeze.
Portioning Liquids and Solids
This step is critical for managing that expansion rate.
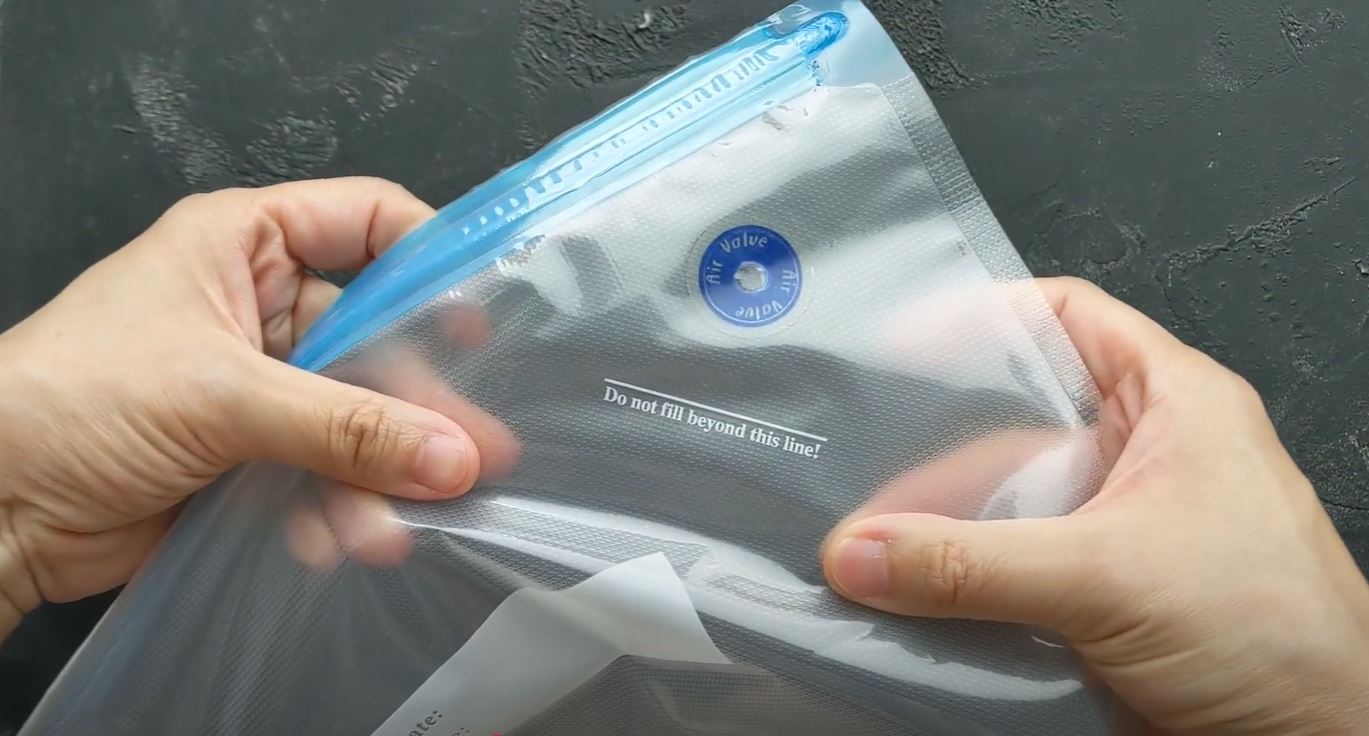
- The Headspace Rule: For liquids like Soups, Broths, or Sauces, you must leave at least one inch of headspace between the liquid surface and the top rim of the jar. This ensures there is ample room for the expanding ice. For larger, wide-mouth quart jars, leaving 1.5 inches is safer.
- Solids and Semi-Solids: Food items with less free water, like hummus or chili, require less, but still need about half an inch of headspace. Items that are entirely solid (like nuts or dried beans) can be filled almost to the brim. Always ensure Even Freezing by pouring liquids in uniform amounts, which helps them freeze at a consistent rate.
Filling the Glass Jar Safely
Successfully freezing in glass depends on a single, vital concept: creating enough empty space above your food to accommodate the expansion of water into ice.
Headspace Guidelines
The most crucial step in preventing jar breakage is adhering strictly to the headspace rule. This empty space serves as the necessary Expansion Room for your frozen contents.
- The 1- to 2-Inch Rule: For most liquids (soups, broths, smoothies), you must leave 1 to 2 inches of empty space between the food’s surface and the rim of the jar. This guideline accounts for the volume increase of water as it freezes.
- More for Larger Jars: If you are using larger jars (quart or half-gallon size), it is always safer to lean toward the larger end of the guideline, leaving closer to 2 inches of space. More volume means more expansion, requiring more safety margin.
- Solids are Different: If you are freezing drier items like chopped fruits, vegetables, or nuts, you can fill the jar almost to the top, leaving just inch, as these items contain less free water to expand.
Shoulder Rule for Mason Jars
If you choose to use jars with tapered shoulders (the standard Regular-Mouth Mason Jars), you must adjust your filling strategy significantly.
- The Danger Zone: The shoulder of a standard jar is a rigid choke-point. Any ice that forms below this point is trapped and will exert immense pressure sideways, guaranteeing a break.
- Fill Below Shoulders: Always ensure your liquid food level is below the shoulders of the jar. This means you will only be able to fill these types of jars about three-quarters of the way full, dedicating the entire headspace from the shoulder up to the expansion room. To avoid this restriction, using Wide-Mouth Jars is always the preferred and safer method.
Using Funnels for Clean Filling
Keeping the rim and threads of the jar clean is a simple measure that protects your food and makes sealing easier.
- Spill Prevention: Use a wide-mouth canning funnel when transferring liquids or even semi-solids into the jar. This ensures all the food goes neatly into the body of the jar, preventing spills onto the rim.
- Sealing Integrity: Food residue or stickiness on the glass threads prevents a tight, perfect seal. A clean rim is vital for maintaining freshness and avoiding leaks during the thawing process.
Freezing Process Step-by-Step
The way you introduce the filled glass jar into the freezing environment is just as important as how you fill it. Slow, controlled transitions are key to Thermal Shock Prevention.
Cooling in Refrigerator First
Never place a jar of warm or room-temperature food directly into the deep freezer. This is the primary cause of thermal breakage.
- Gradual Temperature Change: After filling the jars (remembering the headspace!), leave the lids loosely on and place the jars in the refrigerator for at least four to six hours, or until the contents are completely cold. This process of Gradual Temperature Change allows the entire jar structure to stabilize at a cool temperature.
- The Goal: By cooling them first, you minimize the rapid, uneven contraction of the glass when it hits sub-zero temperatures, drastically reducing the risk of a crack.
Placing Jars in Freezer
Once the jars are fully chilled, they are ready for the freezer. Correct placement will prevent accidental breakage.
- Keep Jars Upright: Always place the jars upright on the Freezer Shelves. This ensures that the contents freeze from the top down, guiding the expanding ice upwards into the headspace you created.
- Avoid Lying on Sides: Do not store full jars on their side until they are completely frozen solid. If you store them on the side, the liquid is next to the seal, increasing the risk of leakage before freezing is complete, and the expansion pressure is directed horizontally, which is less safe.
Avoiding Contact with Cooling Elements
Placement in the freezer can be critical for Crack Prevention.
- The Coldest Spots: Avoid letting the glass jars touch the super-cold metal cooling elements, fins, or the icy walls of a chest freezer. Direct contact with these elements causes one side of the jar to cool much faster than the rest, inviting thermal stress.
- Maintain Space: Leave a small air gap between the Freezer Walls and the jars to allow cold air to circulate freely around them, promoting Even Freezing and reducing concentrated cold spots.
Thawing Glass Jars Without Cracks
After successfully freezing your contents, the job isn’t over. Thawing requires patience and controlled warming to prevent thermal shock in reverse.
Refrigerator Thawing
The safest and most recommended method is using your refrigerator.
- The Slow Defrosting Method: Move the frozen jar from the freezer directly to the refrigerator. Slow Defrosting allows the glass to acclimate gently to the warmer temperature. This can take anywhere from 12 to 24 hours, depending on the jar size.
- Food Safety: This method also adheres to the highest Food Safety standards, as the food never enters the “danger zone” where bacteria multiply quickly.
Room Temperature Thawing
While possible, thawing at Room Temperature must be controlled and done with caution.
- Avoid Direct Sunlight or Heat: Never place a frozen glass jar near a stove, radiator, or in direct, hot sunlight. This Avoiding Sudden Heat rule prevents the outside of the glass from warming much faster than the frozen contents, which can easily cause a thermal crack.
- The Sink Method: If you must thaw faster than the refrigerator allows, place the frozen jar in a container (like a sink or bowl) to catch any potential condensation or minimal leakage. Allow it to thaw naturally on the counter, away from any sudden sources of heat or cold. Once thawed, immediately heat the food or move it back to the refrigerator.