How to Do Makeup Step-by-Step in 2026: The Ultimate Beginner’s Guide to a Flawless Look
Many people feel lost when it comes to doing makeup. They scroll through endless tutorials, buy expensive products, and still end up frustrated because their foundation looks patchy, their eyeshadow doesn’t blend, or their lipstick bleeds outside the lines. The problem isn’t lack of effort it’s not knowing where to start or how each product works together.
This guide solves that. Whether you’re a beginner who wants a polished daily routine or someone looking to elevate your skills, this article breaks down the full makeup process step-by-step. You’ll learn what each product does, how to use it correctly, and how to choose shades that match your skin tone especially if you have brown or deeper skin.
Let’s be honest makeup can feel overwhelming. Between the countless products, trends, and techniques, it’s hard to know what really matters. Maybe you’ve stood in front of the mirror with foundation that looks cakey, eyeliner that smudges, or a lipstick shade that just doesn’t work for your skin tone. You’re not alone.
Most people struggle not because makeup is hard, but because no one ever explained why each step matters. The goal isn’t perfection it’s confidence.
When I first started experimenting with makeup, I wasted time chasing trends without understanding the basics. Once I learned how to prep my skin properly, match my foundation, and balance color on my face, everything changed. My makeup looked natural, it lasted longer, and it finally felt like me.
In this guide, I’ll walk you through a complete beginner-friendly makeup routine from prepping your skin to the final touch of lip gloss. You’ll learn:
-
How to choose the right products for your skin type and tone
-
The correct order to apply makeup for a smooth, natural finish
-
Time-saving techniques that make your routine faster and cleaner
-
Pro-level tips for long-lasting wear
Whether you want a fresh everyday look or a polished glow for a special event, this step-by-step guide gives you everything you need to build confidence and master your makeup routine.
Why Mastering Makeup Fundamentals Matters
Makeup can often feel like a magic trick—a transformative art that conceals flaws and enhances beauty in an instant. But behind every flawless “no-makeup” makeup look and every dramatic glam is a solid understanding of the basics. Mastering makeup fundamentals isn’t about following rigid rules; it’s about understanding the “why” behind the techniques. This knowledge empowers you to create any look you desire, work with your unique features, and ensure your makeup looks impeccable from the moment you apply it until the moment you take it off.
Think of it like building a house. You wouldn’t start with the wallpaper before the foundation was poured. Similarly, a beautiful makeup look is built on a series of deliberate, well-executed steps. The most critical of these is creating a perfect base makeup. A well-prepped and applied base ensures a smooth application and an even finish that makes all subsequent products—like blush, bronzer, and eyeshadow—blend seamlessly. This canvas is directly influenced by your skincare routine and the use of a good primer, proving that makeup and skin health are intrinsically linked.
How to Choose Products for Your Skin Type
One of the most common makeup mistakes is using products that fight against your natural skin, rather than working with it. The key to harmony lies in identifying your skin type and selecting products with product compatibility.
Oily Skin: If you struggle with shine throughout the day, your goal is to control oil without stripping the skin. Look for oil-free and non-comedogenic foundations (often labeled “matte” or “long-wear”) and water-based moisturizers. Avoid heavy, creamy products that can add to the grease.
Dry Skin: For skin that feels tight, flaky, or dull, the objective is to inject hydration and luminosity. Choose liquid foundations with a dewy or satin finish and hydrating, cream-based moisturizers. Steer clear of heavy powders and matte foundations, which can settle into fine lines and emphasize dryness.
Combination Skin: This skin type, which is oily in the T-zone (forehead, nose, chin) and dry on the cheeks, requires a balanced approach. You might use a mattifying primer only in your oily areas and a hydrating one on your dry patches. A natural or semi-matte foundation often works best.
Understanding this fundamental relationship between your skin and your products is the first step toward makeup that feels comfortable and looks beautiful all day.
The Perfect Makeup Order for a Flawless Finish
The sequence in which you apply your makeup is a game of strategic layering and blending. Following a logical order prevents products from caking, sliding off, or interfering with each other.
The general rule is to apply products in order of their texture, from thinnest to thickest, and to use powders to set liquids and creams. A standard, foolproof makeup steps order is:
-
Skincare (Cleanser, Moisturizer, SPF)
-
Primer
-
Foundation (to even out the overall skin tone)
-
Concealer (to spot-correct and highlight, applied after foundation so you don’t wipe it away)
-
Powder (to set the liquid products in place)
-
Bronzer, Blush, Highlighter
-
Eyebrows and Eye Makeup
-
Lips
-
Setting Spray
This structure ensures each layer has something to grip onto, resulting in a cohesive and long-lasting flawless finish.
Skin Preparation (The Secret to Long-Lasting Makeup)
If you take away only one piece of advice from this guide, let it be this: perfect makeup starts with perfect skin prep. This step is the single most important factor in how your makeup looks and how long it wears. Skipping prep is like painting on a dusty, uneven canvas the result will be patchy, unstable, and lackluster.
Cleanse and Moisturize Your Skin
Before any makeup touches your face, your skin must be clean and balanced. Start with a gentle cleanser to remove any overnight impurities, excess oil, or residue from yesterday’s products. A clean slate ensures that your makeup applies evenly and doesn’t mix with dirt, which can lead to clogged pores.
Next, apply a moisturizer suited to your skin type. This step is non-negotiable, even for oily skin. Why?
Hydration: A moisturizer provides essential hydration, plumping up the skin’s surface. This makes fine lines less noticeable and prevents your foundation from clinging to dry patches and settling into creases.
Oil Balance: Contrary to popular belief, moisturizing oily skin helps maintain its oil balance. When skin is stripped of all moisture, it can overcompensate by producing even more oil, causing your makeup to break down faster.
Think of your moisturizer as a nourishing treat that creates a smooth, supple canvas, allowing your makeup to glide on effortlessly.
Apply Primer for a Smooth Base
If moisturizer preps your skin, primer preps your makeup. This product is the ultimate bridge between skincare and cosmetics, and it’s a secret weapon for a flawless face.
A makeup primer is designed to create an ideal surface for foundation to adhere to. Its benefits are multifaceted:
Pore-Minimizing: Many primers are formulated to fill in fine lines and enlarged pores, creating a velvety-smooth texture that makes the skin appear airbrushed.
Long-Wear: Primers create a protective foundation base that grips onto your makeup, preventing it from fading, melting, or transferring throughout the day.
Barrier Protection: It acts as a gentle skin barrier, preventing pigments from settling directly into your pores and making cleanup at the end of the day much easier.
- Whether you want to control shine, boost radiance, or simply make your makeup last through a long day, there is a primer designed for the job. Applying it after moisturizer and before foundation is the key to locking in your look.
- Creating the Perfect Base (Foundation + Concealer)
- The terms “foundation” and “concealer” are often used interchangeably, but they serve distinct, complementary purposes. Mastering their use is the cornerstone of a natural, yet perfected, complexion.
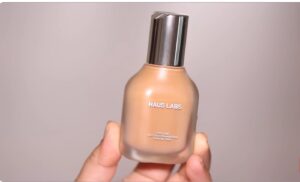
- Choosing the Right Foundation Shade
- Selecting the correct foundation shade is arguably the most daunting part of makeup, but a few simple tips can make it easy.
- Identify Your Undertone: This is the subtle hue beneath your skin’s surface. Are your veins blue/purple (Cool undertone), green (Warm undertone), or a mix of both (Neutral undertone)? Cool undertones look best in pink- or rosy-based foundations, warm undertones in yellow- or golden-based ones, and neutral undertones have the flexibility to wear both.
- Test on Your Jawline: The perfect match should seamlessly blend into both your face and your neck. Test 2-3 shades that look closest to your skin tone on your jawline in natural light. The one that disappears is your match.
- Consider Your Desired Coverage: Foundation comes in various coverages, from a sheer tinted moisturizer to full coverage formulas that camouflage everything. Your choice should reflect your personal style and the condition of your skin. Don’t feel you need full coverage every day; often, a medium-coverage foundation sheered out with a damp sponge looks the most skin-like.
- Applying and Blending Foundation Like a Pro
- The tool you use to apply foundation dramatically changes the finish.
- Beauty Blender (Makeup Sponge): A damp beauty blender is famous for providing a sheer, dewy, and natural look. The stippling and bouncing motion pushes the product into the skin, preventing streaks and offering even coverage without absorbing too much product. It’s ideal for liquid and cream foundations.
- Brush: A dense foundation brush provides more coverage and a more polished finish. Use downward strokes to follow the direction of facial hair for a smooth result. Flat kabuki brushes are great for full coverage, while stippling brushes offer a lighter, airbrushed effect.
- No matter your tool, the golden rule is to blend, blend, blend. Extend the foundation slightly down your neck and onto your ears to avoid any harsh lines of demarcation.
- Using Concealer to Brighten and Correct
- While foundation evens out your overall complexion, concealer is your targeted eraser and highlighter.
- Color Correction & Hiding Blemishes: For active red pimples or broken capillaries, a concealer that matches your foundation shade exactly is best. Dab it precisely on the spot and blend the edges gently.
- Brightening Under Eyes: To combat dark circles, select a concealer that is one to two shades lighter than your foundation with peach or salmon undertones to neutralize the blue-purple discoloration. Apply it in an inverted triangle shape under your eyes to brighten the entire center of your face. This technique of highlighting does more than just conceal; it lifts and adds dimension to your face.
- Technique is Key: Always pat and press concealer into the skin with your fingertip or a small, dense brush. Rubbing or dragging will only remove the product and irritate the delicate under-eye area.
How Bronzer Adds Dimension to Your Face
A flat, one-dimensional complexion is the antithesis of a vibrant, healthy glow. This is where bronzer works its magic. Far from just adding a faux tan, the primary role of bronzer is to impart warmth and create the illusion of contouring by mimicking where the sun would naturally hit your face.
Think of bronzer as a tool for strategic sculpting. By applying it to the high points of your face the temples, the hollows of your cheeks (just below the cheekbones), the jawline, and a light dusting across the bridge of the nose and forehead you are recreating the subtle shadows and sun-kissed tones of a day spent outdoors. This technique brings forward the features you want to emphasize and recedes others, adding crucial depth and structure. The result is a face that looks more defined, rested, and naturally radiant, not just tanned.
Where and How to Apply Highlighter
If bronzer creates shadows, highlighter brings in the light. This product is designed to attract and reflect light, creating a targeted glow that makes the skin appear dewy, youthful, and plump. The key to a natural-looking highlight is strategic placement on the areas that naturally catch the light.
To achieve this ethereal effect, apply highlighter with a fan brush or a small tapered brush to the high points of your face:
The tops of your cheekbones
The brow bone, just under the arch of your eyebrow
The inner corners of your eyes (to brighten and widen the eyes)
The cupid’s bow of your lip
A light dab on the center of your chin and the bridge of your nose
The goal is a seamless, lit-from-within light reflection, not a stripe of glitter. The interplay between the warmth of bronzer and the glow of highlighter is what creates a dynamic, three-dimensional complexion.
Bringing Life to Your Face (Blush + Cream Blush)
Choosing Blush Shades That Match Your Tone
Blush is the workhorse of a healthy complexion, instantly reviving the face by replicating a natural flush. The right shade can brighten your entire look, while the wrong one can look garish or unnatural. The secret lies in choosing a color that mimics what your skin does naturally when you’re slightly flushed.
For fair skin, soft pinks and light peaches are ideal. Medium skin tones shine with rosy and warm mauve shades. Olive skin is complemented by rich apricots and deep pinks, while deeper skin tones can carry off vibrant fuchsia, tangerine, and berry shades with stunning effect. The vibrant color should enhance your skin’s natural undertones, not fight against them.
How to Apply Cream Blush for a Lasting Effect
For a modern, skin-like finish that lasts, cream blush is a game-changer. Its pigmented, blendable formula melts into the skin, providing a dewy finish that looks like a natural part of your complexion rather than a powder sitting on top.
For the most natural effect, apply cream blush after foundation and concealer but before powder. Use your fingertips, a dense stippling brush, or a makeup sponge. Warm the product on the back of your hand, then smile and dab the blush onto the apples of your cheeks, blending upwards towards your temples. The heat from your fingers helps the product seamlessly fuse with your base makeup, ensuring longevity and a fresh, juicy glow that can last all day.
Eye Makeup Essentials (Eyeshadow + Smokey Eye)
Basic Eyeshadow Techniques for Beginners
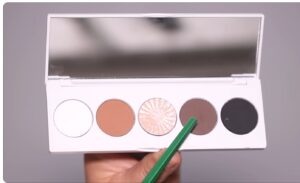
Mastering eyeshadow starts with two principles: blending and understanding pigmentation. Beginners should start with a neutral palette of matte shades.
Primer is Key: Always start with an eye primer to create a smooth base, prevent creasing, and make colors pop.
The Three-Shadow Rule: Use a light shade as a base on the entire lid, a medium-toned shade in the crease to create depth, and a dark shade on the outer corner and along the lash line. The goal is a soft gradient of color.
Blend, Then Blend Again: Use a clean, fluffy blending brush in small, circular motions to soften any harsh lines where the colors meet. Good blending is the difference between a professional look and a messy one.
How to Create a Simple Smokey Eye
The smokey eye is a classic for a reason it’s sultry, defining, and universally flattering. The modern approach is softer and more wearable.
Start with a neutral contour shade in your crease to build depth. Then, take a darker shade (like a charcoal gray, deep brown, or black) and press it along your upper and lower lash lines with a flat brush. The key is to blend the dark shadow upwards and outwards, creating a soft, hazy gradient of color. There should be no stark lines. Use a blending brush to continuously soften the edges until the transition is seamless. This technique adds intense definition without looking overly dramatic.
Defining the Eyes (Eyeliner + Brows)
Applying Eyeliner for Shape and Definition
Eyeliner is the ultimate tool for defining the eye shape and adding intensity. The look you achieve depends entirely on the formula and your application precision.
Pencil: Best for a soft, smudged look. Tightline (apply between the lashes) for fuller-looking lashes or smudge along the lash line for a soft smokey effect.
Liquid or Felt-Tip: Delivers sharp, graphic lines perfect for a classic cat-eye or a crisp wing. Steady your elbow on a table and draw the wing first, extending from your lower lash line.
Gel: Offers the precision of liquid with the blendability of a pencil, often applied with an angled brush.
Filling and Shaping Eyebrows Naturally
Well-groomed brows frame the face and provide symmetry. The goal is to enhance their natural shape, not draw on a new one. Use a brow pencil that matches your hair color to draw fine, hair-like strokes in sparse areas, following the natural direction of your growth. Then, use a spoolie brush to blend the product and brush the hairs upwards for a feathered effect. Finally, set them in place with a clear or tinted brow gel to lock in the shape and add definition all day
Lashes and Volume (Mascara + Curler) Using Mascara for Fuller Lashes
Mascara is the final step to opening up the eyes, providing both length and volume. For the best application, start at the base of the lashes and wiggle the wand back and forth as you pull it through to the tips. This deposits the most product at the root, which gives the illusion of a thicker lash line. For even more drama, apply a second coat before the first one fully dries.
The Right Way to Use an Eyelash Curler
An eyelash curler provides an instant eye-opening lift that mascara alone can’t achieve. For best curl retention, use it before applying mascara on clean, dry lashes. Gently clamp the curler at the base of your lashes and hold for a count of five to ten, then gently pulse it down the length of the lash. A quick pass with a heated curler (or blasting your metal one with a hairdryer for a few seconds) can help set the curl, but be careful not to burn yourself.Perfecting the Lips (Lip Color + Liner)
Choosing Lip Colors That Flatter Your Skin Tone
The right lip color can tie your entire look together. Generally, cool undertones look best in blue-based reds, pinks, and berries. Warm undertones shine in orange-based reds, corals, and browns. Neutral undertones can wear almost anything. Consider the texture: a matte finish is long-wearing and bold, while a lip gloss adds volume and a youthful shine. Always start with a hydrated base using lip balm to ensure smooth application.
How to Use Lip Liner for a Defined, Long-Lasting Pout
Lip liner is essential for shape control and smudge prevention. Choose a shade that matches your natural lip color or your lipstick. Start by outlining your cupid’s bow, then follow the natural border of your lips. You can then fill in your entire lips with the liner—this creates a base that helps your lipstick last for hours, even after the color on top has faded.
Setting Makeup for All-Day Wear
To lock your hard work in place, use a light dusting of setting powder (focusing on the T-zone) to absorb oil and set liquid products. Then, mist your face with a setting spray. This melts the powders into the skin, eliminates any cakeyness, and provides longevity for a fresh matte finish or a dewy glow, depending on the formula.
Final Tips for Refreshing Makeup Throughout the Day
Carry blotting paper to pat away midday shine without disturbing your foundation. A quick spritz of a hydrating setting mist can refresh your makeup and your skin, offering oil control and touch-up ease.
Special Focus Makeup for Brown Skin
The rich diversity of brown skin often has beautiful warm undertones of red, orange, or gold. Foundations with these undertones prevent an ashy or gray cast. For hyperpigmentation and dark circles, a peach corrector is often more effective than a light concealer, as it neutralizes the darker pigments for a perfectly even tone.
Best Blush, Bronzer, and Lip Shades for Brown Skin
Embrace vibrant and rich pigments. For blush, think coral, plum, and deep rose for a stunning contrast. Bronzer should be rich and warm, not orange. On lips, deep berries, terracotta, and bold oranges are incredibly flattering.
How to Highlight Brown Skin Beautifully
Skip the silvery-white highlights. A gold highlighter or one with a rich, champagne tone will impart a radiant glow that complements the skin’s natural warmth, making it look luminous and healthy.
Common Makeup Mistakes and How to Fix Them
Patchy Foundation: Caused by poor skincare or mixing incompatible products (e.g., a water-based foundation with a silicone primer). Solution: Ensure your skincare is fully absorbed and use primers and foundations with the same base.
Overdone Blush or Harsh Contour: Solution: Use a clean, fluffy brush to blend out the edges and soften the color. You can also tap a little foundation over top to tone it down.
Uneven Eyeliner: Solution: Use a pointed cotton swab dipped in micellar water to clean up the lines. For a smudged look, use a small brush to blend the unevenness.
How AI Tools Help Match Shades Perfectly
AI shade matcher tools, available on many brand websites and apps, use your device’s camera to analyze your skin’s tone analysis with incredible precision, recommending the perfect foundation, concealer, and powder matches without you ever setting foot in a store.
Virtual Try-Ons and Personalized Beauty Routines
An AI makeup assistant can power virtual try-ons, allowing you to test thousands of lipstick and eyeshadow colors in real-time. These systems learn your preferences, offering customization and time-saving recommendations for a personalized beauty routine tailored just for you.
Final Thoughts Confidence Starts with Practice
Mastering the basics of makeup is not about achieving a mask of perfection. It is about understanding the tools and techniques that allow you to highlight your favorite features and express your inner creativity. Makeup is self-expression, not perfection. Your face is the canvas, and you are the artist. Be patient, experiment, and remember that every pro was once a beginner. The real power of makeup lies not in the products, but in the confidence you gain from knowing how to use them.